
In This Article
Every graphite drawing hits the same awkward moment. The shading is down and the form is there, but each pencil stroke sits on the paper like a railway sleeper, announcing itself to anyone who looks. Smooth skin, polished chrome and a sky that melts into the horizon all fall flat until those marks dissolve into tone. That is exactly where a blending brush for graphite drawing earns its place in your kit. 🎨
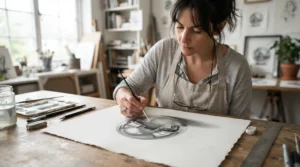
Fingers leave skin oil and greasy patches. Tissue is quick but sheds fluff. Paper stumps are brilliant for detail, yet they scrub rather than float. A soft brush works differently. One art-supply guide notes that soft brushes move graphite while barely touching the paper, which is why they suit delicate transitions so well.
Blending also sits alongside hatching, crosshatching and stippling in the core skills taught at institutions like Tate Britain’s introductory sketching workshops. It is foundational, not a cheat.
This guide compares seven real tools, from pound-shop-priced goat-hair mops to purpose-built shader sets. Along the way you’ll get practical sections on brush for pencil shading, choosing a soft gradient tool for graphite, building smoother pencil gradients, and developing a realistic drawing technique. Product details come from manufacturer and retailer listings and aggregated review pages at the time of research (October 2026). Stock and prices on amazon.co.uk change often, so check current price and availability before buying.
What Is a Blending Brush for Graphite Drawing?
A blending brush for graphite drawing is a soft, dry brush used to spread and smooth pencil marks across paper, turning visible strokes into seamless tone. Made from goat hair, synthetic fibres or makeup-style bristles, it moves loose graphite with minimal pressure. That makes soft gradients, smooth skin and misty backgrounds far easier to achieve.
Think of graphite as fine, flaky dust held on by the paper’s tooth. A pencil deposits it in lines, and a blending tool redistributes it into an even film. Stumps and tortillons push that dust firmly. Chamois leather and sponges sweep it. A brush feathers it, which is why it’s the gentlest option for subtle pencil gradients.
You’ll hear brushes described in three broad families:
- Mop brushes: large, domed heads for skies, backgrounds and cheeks.
- Pointed pencil-style brushes: small tips for eyes, lips and tight corners.
- Purpose-made shader brushes: sold specifically for graphite and charcoal.
Each family suits a different job, and the rest of this guide shows you which is which.
Quick Comparison: Blending Brush for Graphite Drawing Options at a Glance
| Product | Type | Best For | Price Range |
|---|---|---|---|
| Daler-Rowney Graduate Black Goat Round Mop | Goat-hair mop | Budget beginners, broad backgrounds | Under £5 |
| Winsor & Newton Professional Series 150 Goat Mop | Goat-hair mop | Large, ultra-even tonal sweeps | Roughly £10-£20 |
| NYX Professional Makeup Pro Blending Brush | Fluffy makeup brush | Soft, low-cost experimentation | Under £10 |
| Nanshy Pro Pencil Makeup Brush | Pointed synthetic brush | Small details and tight corners | Under £10 |
| Tafula Pencil Brush Shader Set | Two-brush graphite set | One-set solution for small and large areas | Check current price |
| Kosiz Blending Sponge Pen Set | Sponge and felt pens | Clean, controlled small-area shading | Under £10 |
| Pro Art Blending Paper Stumps | Paper stumps | Crisp detail and edge work | Under £10 |
Looking at the comparison above, the Daler-Rowney Graduate Black Goat Round Mop is the cheapest route into proper brush blending, while the Winsor & Newton Professional Series 150 Goat Mop only makes sense if you’ll also paint with it. The NYX Professional Makeup Pro Blending Brush and Nanshy Pro Pencil Makeup Brush prove you don’t need art-shop labels to get soft results. Most drawers will end up wanting one big brush and one small tool, so the real question is which pair suits you.
💬 Just one click — help others make better buying decisions too!😊
Top 7 Blending Brush for Graphite Drawing Picks: Expert Analysis
1. Daler-Rowney Graduate Black Goat Round Mop — best budget soft mop
If you wanted proof that a soft gradient tool for graphite needn’t cost more than a bus fare, this is it. The Graduate range is aimed at students, and this mop is made from natural black goat hair on a short, pearl-white handle. It’s commonly sold in half-inch and one-inch sizes.
Daler-Rowney positions it for softening and blending with minimal visible brushstrokes. That translates neatly to graphite: the plump, floppy head spreads tone over a wide area without leaving bristle tracks. UK retailer listings also note it keeps its shape wet or dry, so it won’t flatten after a few sessions.
Based on the spec comparison, the half-inch suits A4 and A3 work, while the inch is for big skies and backgrounds. It’s a watercolour brush, so keep one strictly for dry graphite. Stray pigment from a previous life would ruin pale shading.
Aggregated retailer reviews are split. Buyers praise the softness and value for blending paint, while a recurring complaint is hairs shedding, especially in early use. Shake and stroke the brush on scrap paper before touching your drawing.
Pros:
- ✅ Very soft, plush head for broad gradients
- ✅ Extremely cheap, so you can dedicate it to graphite
- ✅ Holds its shape without flattening
Cons:
- ❌ Natural hairs can shed, especially when new
- ❌ Made for painting, so no graphite-specific design
Price: under £5, which makes it a no-brainer first purchase and a sensible way to test whether brush blending suits you.
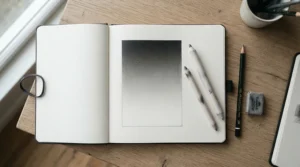
2. Winsor & Newton Professional Series 150 Goat Mop — premium mop for large, even tones
Where the budget mop is soft and friendly, this one is the serious option. The Winsor & Newton Professional Series 150 Goat Mop is built from soft goat hair with a slightly rougher texture than squirrel hair. It comes with short handles and seamless nickel-plated ferrules on the black-hair version.
The maker describes it as ideal for large washes and blending, with good colour-carrying capacity and control. For graphite, the slightly rougher fibre texture shifts pigment with a little more authority than a feather-light synthetic would. That’s useful once you’re working in heavier B grades. The seamless ferrule matters too, because loose ferrules and slipping heads are what kill brushes early.
Honestly, this is an upgrade only if you’ll also paint with it, or if you’re doing large-format, background-heavy work where a bigger, better-made head pays off. For small A5 sketches it’s overkill.
One transparency note: I couldn’t verify a meaningful pool of customer reviews tied to graphite use for this model. The recommendation rests on construction and specifications, not user testimony, so treat it accordingly.
Pros:
- ✅ Seamless ferrule built for long service life
- ✅ Excellent for broad, even tonal sweeps
- ✅ Doubles as a proper watercolour mop
Cons:
- ❌ Priciest brush in this round-up
- ❌ No graphite-specific reviews found to verify
Price: expect roughly £10-£20 depending on size (check current price). It’s a quality tool, but only good value if you’ll use its full range.
3. NYX Professional Makeup Pro Blending Brush — best fluffy brush for broad pencil gradients
Here’s the dark horse: a makeup brush that behaves like a miniature art mop. It has long, light, rounded bristles designed to blend eyeshadow edges into a diffused, soft-focus finish. That’s essentially what you want from pencil gradients on paper.
Powder-on-skin and graphite-on-paper are close cousins physically. Both involve loose particles that need nudging rather than scrubbing. The domed, tapered head flexes under pressure, so it self-limits how hard you press, which is a quiet blessing for beginners who tend to bear down. Dedicated art guides openly recommend inexpensive makeup brushes for this exact reason.
The catch is precision. The fluffy head is wonderful across cheeks, backgrounds and large forms, but it’s too soft and wide for fine eye detail. Pair it with a pointed tool for that.
Reviews on a UK beauty retailer’s page describe it as soft, inexpensive and fluffy. Remember those reviewers were judging eyeshadow performance, so the signal is about softness and value, not drawing results.
Pros:
- ✅ Very soft domed head for large forms
- ✅ Cheap enough to dedicate to graphite
- ✅ Widely available on the high street
Cons:
- ❌ Designed for makeup, not drawing
- ❌ Too fluffy for fine detail
Price: under £10. For anyone curious about brush blending, this is arguably the lowest-risk way in.
4. Nanshy Pro Pencil Makeup Brush — pointed tip for small-area smoothing
Detail is where mops fail, and this tool exists to fix that. The Nanshy Pro Pencil Makeup Brush has a pointed head of ultra-soft vegan Taklon (synthetic) bristles, a wooden handle and a metal ferrule. It’s designed in the UK for smudging eyeliner and defining the crease.
That job description translates beautifully to a brush for pencil shading in tight spaces: irises, lip corners, jewellery highlights and the tear duct. Synthetic bristles avoid the animal-hair shedding that some natural brushes suffer from, and they tend to be easy to keep clean.
Based on the spec comparison, it’s the natural partner for a bigger mop. Use the mop for the broad tonal transitions, then switch to this for the last 10% of controlled softening. It is gentle by design, so pushing dark graphite around in a tiny area will require patience or a slightly firmer hand. Too much pressure splays a soft pointed tip.
I couldn’t verify a reliable review pool for this specific brush at the time of research, so there’s no sentiment claim here. The case rests on its shape and construction.
Pros:
- ✅ Pointed tip reaches tight detail
- ✅ Synthetic bristles avoid natural-hair shedding
- ✅ UK-designed and very affordable
Cons:
- ❌ Far too small for backgrounds
- ❌ Makeup-oriented, with no drawing guidance
Price: under £10, which is excellent value as a detail companion.
5. Tafula Pencil Brush Shader Set — purpose-made two-brush graphite set
Most blending brushes are borrowed from painters or makeup artists. The Tafula Pencil Brush Shader Set was designed with graphite shading in mind. The set has a small brush with a long red grip for detail and a wide brush with a short blue handle for larger areas.
The maker says the bristles absorb graphite as you blend, so you can then shade other areas without re-applying pencil. It recommends use with graphite grades such as 2H, HB, 3B, 4B and 6B, plus charcoal, graphite powder and graphite sticks. The maker also claims “no cleaning needed” and up to 75% faster shading. Those are manufacturer claims, not independently verified.
The loading idea is sound: a dirty stump behaves like a soft pencil too, adding subtle tone as you work. The trade-off is tonal drift. As the brush loads up, it deposits more graphite, so wipe it on scrap paper when moving to lighter areas.
Two practical caveats. First, I couldn’t confirm that this set is stocked on amazon.co.uk, so check availability. Second, I found no customer reviews on the page I reviewed, so I can’t summarise sentiment. If it isn’t available, pairing numbers 1 and 4 achieves a similar large-plus-small setup.
Pros:
- ✅ Two sizes covering large and small areas
- ✅ Designed around graphite and charcoal
- ✅ Loaded bristles can shade without extra pencilling
Cons:
- ❌ Speed claims are unverified
- ❌ UK availability must be checked
Price: check current price; it sits firmly in the budget accessory category, and it’s worth a look if you want a one-box solution.
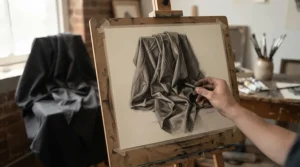
6. Kosiz Blending Sponge Pen Set — sponge and felt pens for tight, clean control
Not everyone loves hair brushes, and this set is the alternative. The Kosiz Blending Sponge Pen Set is a six-piece collection of dual-ended pens, each with a sponge tip on one end and a firmer, felt-like tip on the other, in two sizes.
That gives you two textures per pen. The felt end acts like a stump for firmer pushing, while the sponge end sweeps soft tone for gentle gradients. Double-ended means double the working life, and there’s no paper to fray. It isn’t strictly a brush, but it earns its spot as a soft gradient tool for graphite for people who prefer a pen-style grip.
Aggregated reviews are mostly positive for graphite. Buyers say it beat regular paper stumps for shading, and they use it on zentangles and for smoothing coloured pencil. The most common complaints are that the black sponge can feel too soft and floppy, and that it performs poorly on soft pastels. Since this guide is about graphite, the pastel limitation barely matters.
Pros:
- ✅ Two textures in every pen
- ✅ Good for tiny, controlled shading areas
- ✅ Multi-pack keeps costs down
Cons:
- ❌ Softest sponge ends can feel floppy
- ❌ Not suited to soft pastel work
Price: under £10 for the set, which is strong value for the number of tools you get.
7. Pro Art Blending Paper Stumps — the classic stump benchmark for detail
Every blending brush for graphite drawing needs a partner, and this is the traditional one. Pro Art Blending Paper Stumps are tightly compacted paper cylinders pointed at both ends. They can be cleaned and re-pointed with sandpaper. ARTnews notes that many artists consider Taiwan-made stumps the best around, and it names Pro Art as its top recommendation in its roundup of tortillons and blending stumps.
The firm tip pushes graphite into the paper’s tooth, producing a denser, smoother finish than the airy dusting of a brush. That’s brilliant for crisp edges, eyelashes, reflections and small gradients. Brushes can’t do that as precisely.
The honest take is that a stump complements a brush rather than replacing one. Use the brush for large soft transitions and the stump for edges and fine work. Stumps wear out and get dirty, so replace them rather than fighting them.
The evidence here is editorial endorsement, not aggregated customer reviews. I couldn’t verify review statistics, so none are claimed.
Pros:
- ✅ Precise, firm control for detail
- ✅ Two usable ends, cleanable with sandpaper
- ✅ Very cheap multi-pack
Cons:
- ❌ Scrubs rather than floats graphite
- ❌ Wears out and dirties quickly
Price: under £10; indispensable value as a companion tool.
Head-to-Head: Comparing All Seven Blending Brush for Graphite Drawing Tools
| Product | Type | Softness | Price Range | Review Signal | Best For |
|---|---|---|---|---|---|
| Daler-Rowney Graduate Black Goat Round Mop | Goat mop | High | Under £5 | Mixed: soft but sheds | Budget backgrounds |
| Winsor & Newton Professional Series 150 Goat Mop | Goat mop | High | £10-£20 | Not verified | Large-format work |
| NYX Professional Makeup Pro Blending Brush | Makeup brush | Very high | Under £10 | Positive (softness, value) | Beginners, broad forms |
| Nanshy Pro Pencil Makeup Brush | Pointed synthetic | High | Under £10 | Not verified | Fine detail |
| Tafula Pencil Brush Shader Set | Graphite brush set | Medium-high | Check current price | No reviews found | All-in-one setups |
| Kosiz Blending Sponge Pen Set | Sponge/felt pens | Medium-high | Under £10 | Positive for graphite | Small, clean shading |
| Pro Art Blending Paper Stumps | Paper stump | Low-medium | Under £10 | Editorial endorsement | Edges, crisp detail |
The table shows a clear pattern: softness drops as precision rises. The NYX Professional Makeup Pro Blending Brush and mop brushes sit at the soft end, great for large pencil gradients, while Pro Art Blending Paper Stumps and the Kosiz Blending Sponge Pen Set trade softness for control. If you buy only two tools, one soft mop-style brush and one precise tool covers nearly every drawing situation.
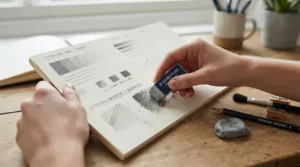
How to Choose a Blending Brush for Graphite Drawing
To choose a blending brush for graphite drawing, match the head size to your paper, pick the softest bristle that still moves graphite, and keep one brush dedicated to dry use. Add a small precise tool for detail and you’re covered.
- Match head size to paper. A half-inch mop suits A4 and A3. For A2 and above, go bigger, otherwise you’ll blend in patchy sections.
- Pick the head shape. Domed mops suit curves and backgrounds, pointed brushes suit eyes and corners, and flat shapes suit edges.
- Choose the hair type. Goat hair is soft and thirsty. Synthetic Taklon-style bristles resist shedding and wipe clean easily.
- Check dry-use suitability. Painting brushes work, but keep them dry and separate from any paint use.
- Mind the handle length. Short handles give control for close work, longer ones help at an easel.
- Budget for two tools. One big and one small beats one expensive all-rounder.
- Remember your pencils and paper. Softer B grades blend more readily, and grades vary between brands, so a 2B from one maker may feel different from another’s.
That last point matters. As one fine-art teacher explains in his breakdown of pencil grades, grades are relative to each manufacturer’s own mix, so test your pencils with your brush rather than trusting the label.
Blending Brush vs Paper Stump vs Fingers
A brush blends by dispersing. A stump blends by pressing. Fingers blend by smearing and bring skin oils with them. Those three verbs explain nearly everything about their results.
With a brush, graphite particles drift outwards into a thin, even veil. That’s ideal for gradients and large tonal fields because you rarely see the tool’s marks. Stumps and tortillons pack graphite into the tooth, giving denser, more controlled blends that suit detail. Tortillons have a single point and are usually discarded when dirty, whereas stumps have two points and can be cleaned with sandpaper.
Fingers? Fine for a quick test. Skin oil transfers to the paper and can leave greasy patches that resist further graphite.
| Method | Softness of Touch | Precision | Cleanliness | Best For |
|---|---|---|---|---|
| Soft brush such as the Daler-Rowney Graduate Black Goat Round Mop | Very high | Low-medium | High | Large gradients |
| Pro Art Blending Paper Stumps | Medium | High | Medium | Edges, detail |
| Tortillon | Medium | High | Low | Tiny areas |
| Fingers | Medium | Low | Low | Quick tests only |
| Kosiz Blending Sponge Pen Set | Medium-high | Medium-high | Medium | Small clean shading |
Looking at the table, brushes win on cleanliness and soft finish, and stumps win on precision. For a realistic drawing technique, the answer isn’t “either/or”. Use a brush for broad tone and a stump for edges, and avoid fingers on anything you plan to frame.
Features That Actually Matter (And Those That Don’t)
What Matters
Softness and spring. The head should flex under light pressure and recover. A brush that’s too stiff will scrub and leave tracks. One that’s too floppy will wander. The sweet spot is what the NYX Professional Makeup Pro Blending Brush and the Daler-Rowney Graduate Black Goat Round Mop do well: yield, then rebound.
Head shape. A domed head blends in arcs and follows curves. A pointed one reaches detail, as with the Nanshy Pro Pencil Makeup Brush. A flat head works along straight edges. Choose for your subject, not your budget.
Fibre stability. Shedding hairs mean stray lines in a pale gradient. If you struggle with that, synthetic fibres are safer. Natural-hair brushes often settle down after a few uses.
What Doesn’t
“Artist-grade” labelling. It tells you little about dry graphite performance. The Winsor & Newton Professional Series 150 Goat Mop is superb as a watercolour mop, but the extra cost only pays off if you use that quality elsewhere.
Set size. More pieces isn’t better. The Kosiz Blending Sponge Pen Set offers six, but you’ll probably use two sizes regularly.
Hype claims. The Tafula Pencil Brush Shader Set‘s speed claims are interesting but unverified, so judge the tool on your own results.
✨ Ready to Upgrade Your Shading Kit?
🔍 Take your pencil gradients to the next level with these carefully selected tools. Click on any highlighted product to check current pricing and availability. They’ll help you create smooth, realistic shading you’ll be proud to frame!
Brush for Pencil Shading: A Step-by-Step Usage Guide
A brush for pencil shading only performs well if you use it properly. Here’s a routine that avoids the usual mess.
Setup:
- Lay down graphite with a soft pencil, typically 2B to 6B, in strokes running in one direction. Softer grades blend more readily.
- Test your brush on scrap paper first. Shake it, stroke it, and check for stray hairs.
- Blend in the same direction as your pencil strokes with the lightest pressure that still moves graphite. This follows common advice for blending with brushes.
- Use your brush’s loaded graphite to extend the tone into lighter areas without adding more pencil.
- Deepen the darks after blending, since blending lightens them.
- Lift highlights with a kneaded eraser.
Maintenance schedule:
- After each session: tap out loose graphite and wipe the head on scrap paper.
- Weekly: check for shedding or splaying.
- Store: head-up in a pot, never bristles-down.
Common mistakes in the first 30 days:
- Pressing too hard, which grinds graphite into the paper and kills gradients.
- Using one brush for both paint and graphite.
- Blending before the drawing’s structure is secure.
- Chasing “perfect smooth” and losing the paper’s natural texture.
Soft Gradient Tool for Graphite: Which Kind Suits Which Job?
The right soft gradient tool for graphite depends on what you’re drawing, not which tool is “best”.
Skies and backgrounds want a big, soft mop: the Daler-Rowney Graduate Black Goat Round Mop or, for large work, the Winsor & Newton Professional Series 150 Goat Mop. The large head covers ground fast, and the soft fibres leave no tracks.
Skin and cheeks suit the NYX Professional Makeup Pro Blending Brush. Its domed head follows curves and gives a gentle, even finish, which is why it works well on portraits.
Eyes, lips and jewellery need the Nanshy Pro Pencil Makeup Brush or the felt end of a Kosiz Blending Sponge Pen Set pen, where you need small, controlled movements.
Hard edges and crisp reflections belong to Pro Art Blending Paper Stumps, because their firm tips pack graphite exactly where you point them.
Mixed subjects might suit the Tafula Pencil Brush Shader Set, assuming it’s available, because its two sizes cover a range of areas in one purchase.
A good rule is to start with the softest tool for the largest area and work down in size as you add detail. Skipping straight to the smallest tool across a big area almost always produces patchy gradients.
Pencil Gradients in Practice: Three Real-World Scenarios
Scenario 1: The Student on a Tight Budget
Maya is a first-year illustration student with around £10 to spend. She draws on A4 pads three or four times a week at a small desk. The Daler-Rowney Graduate Black Goat Round Mop plus the Kosiz Blending Sponge Pen Set covers broad tone and fine detail for well under that. Her biggest risk is shedding hairs in light areas, so she shakes the mop before every session.
Scenario 2: The Weekend Portrait Hobbyist
Tom draws portraits on A3 paper once or twice a week at the kitchen table. His budget is around £20. He needs smooth skin and crisp eyes, so the NYX Professional Makeup Pro Blending Brush handles cheeks and forehead, the Nanshy Pro Pencil Makeup Brush softens the eyes, and Pro Art Blending Paper Stumps sharpen edges. He chooses a soft 4B for broad tone and keeps a harder grade for details. Pencil grades vary by brand, so he tests each one first.
Scenario 3: The Large-Format Landscape Artist
Priya works on A2 sheets at an easel, drawing skies and hills most weekends. Her budget is higher, around £30. She wants the biggest, best-made soft head available, so the Winsor & Newton Professional Series 150 Goat Mop is justified, and she pairs it with a small detail tool. The mop’s size lets her blend whole skies in a few sweeps, which prevents visible joins.
Realistic Drawing Technique: Common Blending Problems and Fixes
A realistic drawing technique relies on controlled softness, not maximum smoothness. Here are the problems that trip most people up.
Problem 1: Streaky gradients. Streaks usually come from pressing too hard or blending against the grain of your strokes. Layer lightly with a soft B pencil, then blend in the same direction with a mop-style brush such as the Daler-Rowney Graduate Black Goat Round Mop.
Problem 2: Muddy, grey patches. Overloaded brushes redeposit graphite everywhere. Wipe the head on scrap paper between areas. If you’re using the Tafula Pencil Brush Shader Set, remember its bristles are designed to load up, so clean-wipe before moving to light zones.
Problem 3: Lost texture. Over-blending can flatten a subject until it looks airbrushed. Leave some paper tooth visible, and use directional strokes. As The Virtual Instructor’s graphite guide points out, directional strokes help create the illusion of form even when blending.
Problem 4: Stray hairs and fluff. Shake new brushes first. If shedding continues, switch to a synthetic tool like the Nanshy Pro Pencil Makeup Brush.
Problem 5: Smudged edges. A dragging hand ruins finished areas, so rest your palm on a clean sheet of paper.
Long-Term Cost & Maintenance
| Product | Price Range | Maintenance | Value Verdict |
|---|---|---|---|
| Daler-Rowney Graduate Black Goat Round Mop | Under £5 | Dry wipe, store head-up | Superb entry value |
| Winsor & Newton Professional Series 150 Goat Mop | £10-£20 | Dry wipe, store head-up | Good only for dual use |
| NYX Professional Makeup Pro Blending Brush | Under £10 | Tap out, dry wipe | Great low-cost option |
| Nanshy Pro Pencil Makeup Brush | Under £10 | Tap out, dry wipe | Strong detail value |
| Tafula Pencil Brush Shader Set | Check current price | Wipe on scrap | Depends on availability |
| Kosiz Blending Sponge Pen Set | Under £10 | Rub clean on scrap paper | Excellent multipack value |
| Pro Art Blending Paper Stumps | Under £10 | Sandpaper to refresh | Cheap, replace when worn |
The real cost of blending tools isn’t the sticker price, it’s how long they last. A brush that sheds early or splays is a false economy, while stumps are cheap enough to treat as consumables. For most artists, two inexpensive brushes plus a pack of stumps costs less than a single premium mop, and it covers more situations.
Frequently Asked Questions
❓ Can I use a makeup brush as a blending brush for graphite drawing?
❓ How do I clean a graphite blending brush?
❓ Do I need separate brushes for charcoal and graphite?
❓ Which pencil grades give the smoothest pencil gradients?
❓ Is a goat-hair mop worth buying for graphite?
Conclusion
The best blending brush for graphite drawing isn’t a single product, it’s a small, sensible kit. A soft mop like the Daler-Rowney Graduate Black Goat Round Mop handles the broad strokes, a pointed tool like the Nanshy Pro Pencil Makeup Brush tackles detail, and a classic like Pro Art Blending Paper Stumps sharpens the edges. If you want a premium option, the Winsor & Newton Professional Series 150 Goat Mop is a quality build, though it’s most worthwhile if you’ll use it for painting too.
For beginners, I’d start with the NYX Professional Makeup Pro Blending Brush and the Kosiz Blending Sponge Pen Set, because the low cost lets you experiment without commitment. If you want a purpose-made set, the Tafula Pencil Brush Shader Set is worth checking for availability, though its speed claims remain unverified.
Remember the fundamentals: build your tone with soft B pencils, blend in the direction of your strokes, use the lightest pressure that works, and leave some paper tooth visible. Those habits matter more than any brand name, and they’re the heart of a convincing realistic drawing technique.
✨ Ready to Smooth Out Your Shading?
🔍 Pick the brush that fits your paper size and subject, click any highlighted product to check current pricing and availability, and start building the soft pencil gradients your drawings deserve!
Recommended for You
- Blending Supplies For Artists: 7 Best Budget Picks (2026)
- Tortillon Set For Beginners: 7 Proven Picks For UK Artists (2026)
- Blending Stump For Charcoal Drawing: 7 Best UK Picks (2026)
Disclaimer: This article contains affiliate links. As an Amazon Associate, I earn from qualifying purchases. If you purchase products through these links, we may earn a small commission at no additional cost to you.
✨ Found this helpful? Share it with your friends! 💬🤗
